Near Miss
Near Miss Investigation

Image 1
- Investigation Team members will find the Near Miss under “For Your Action” tab. Go to My Action | For Your Action tab. (Image 1)
- All tasks assigned to user will be displayed in a tabular manner.
- Click Subject, Section, Action to be Taken, Assign Date, Assigned By, Target Date and Status on header on the table to view the tasks in ascending/descending order.
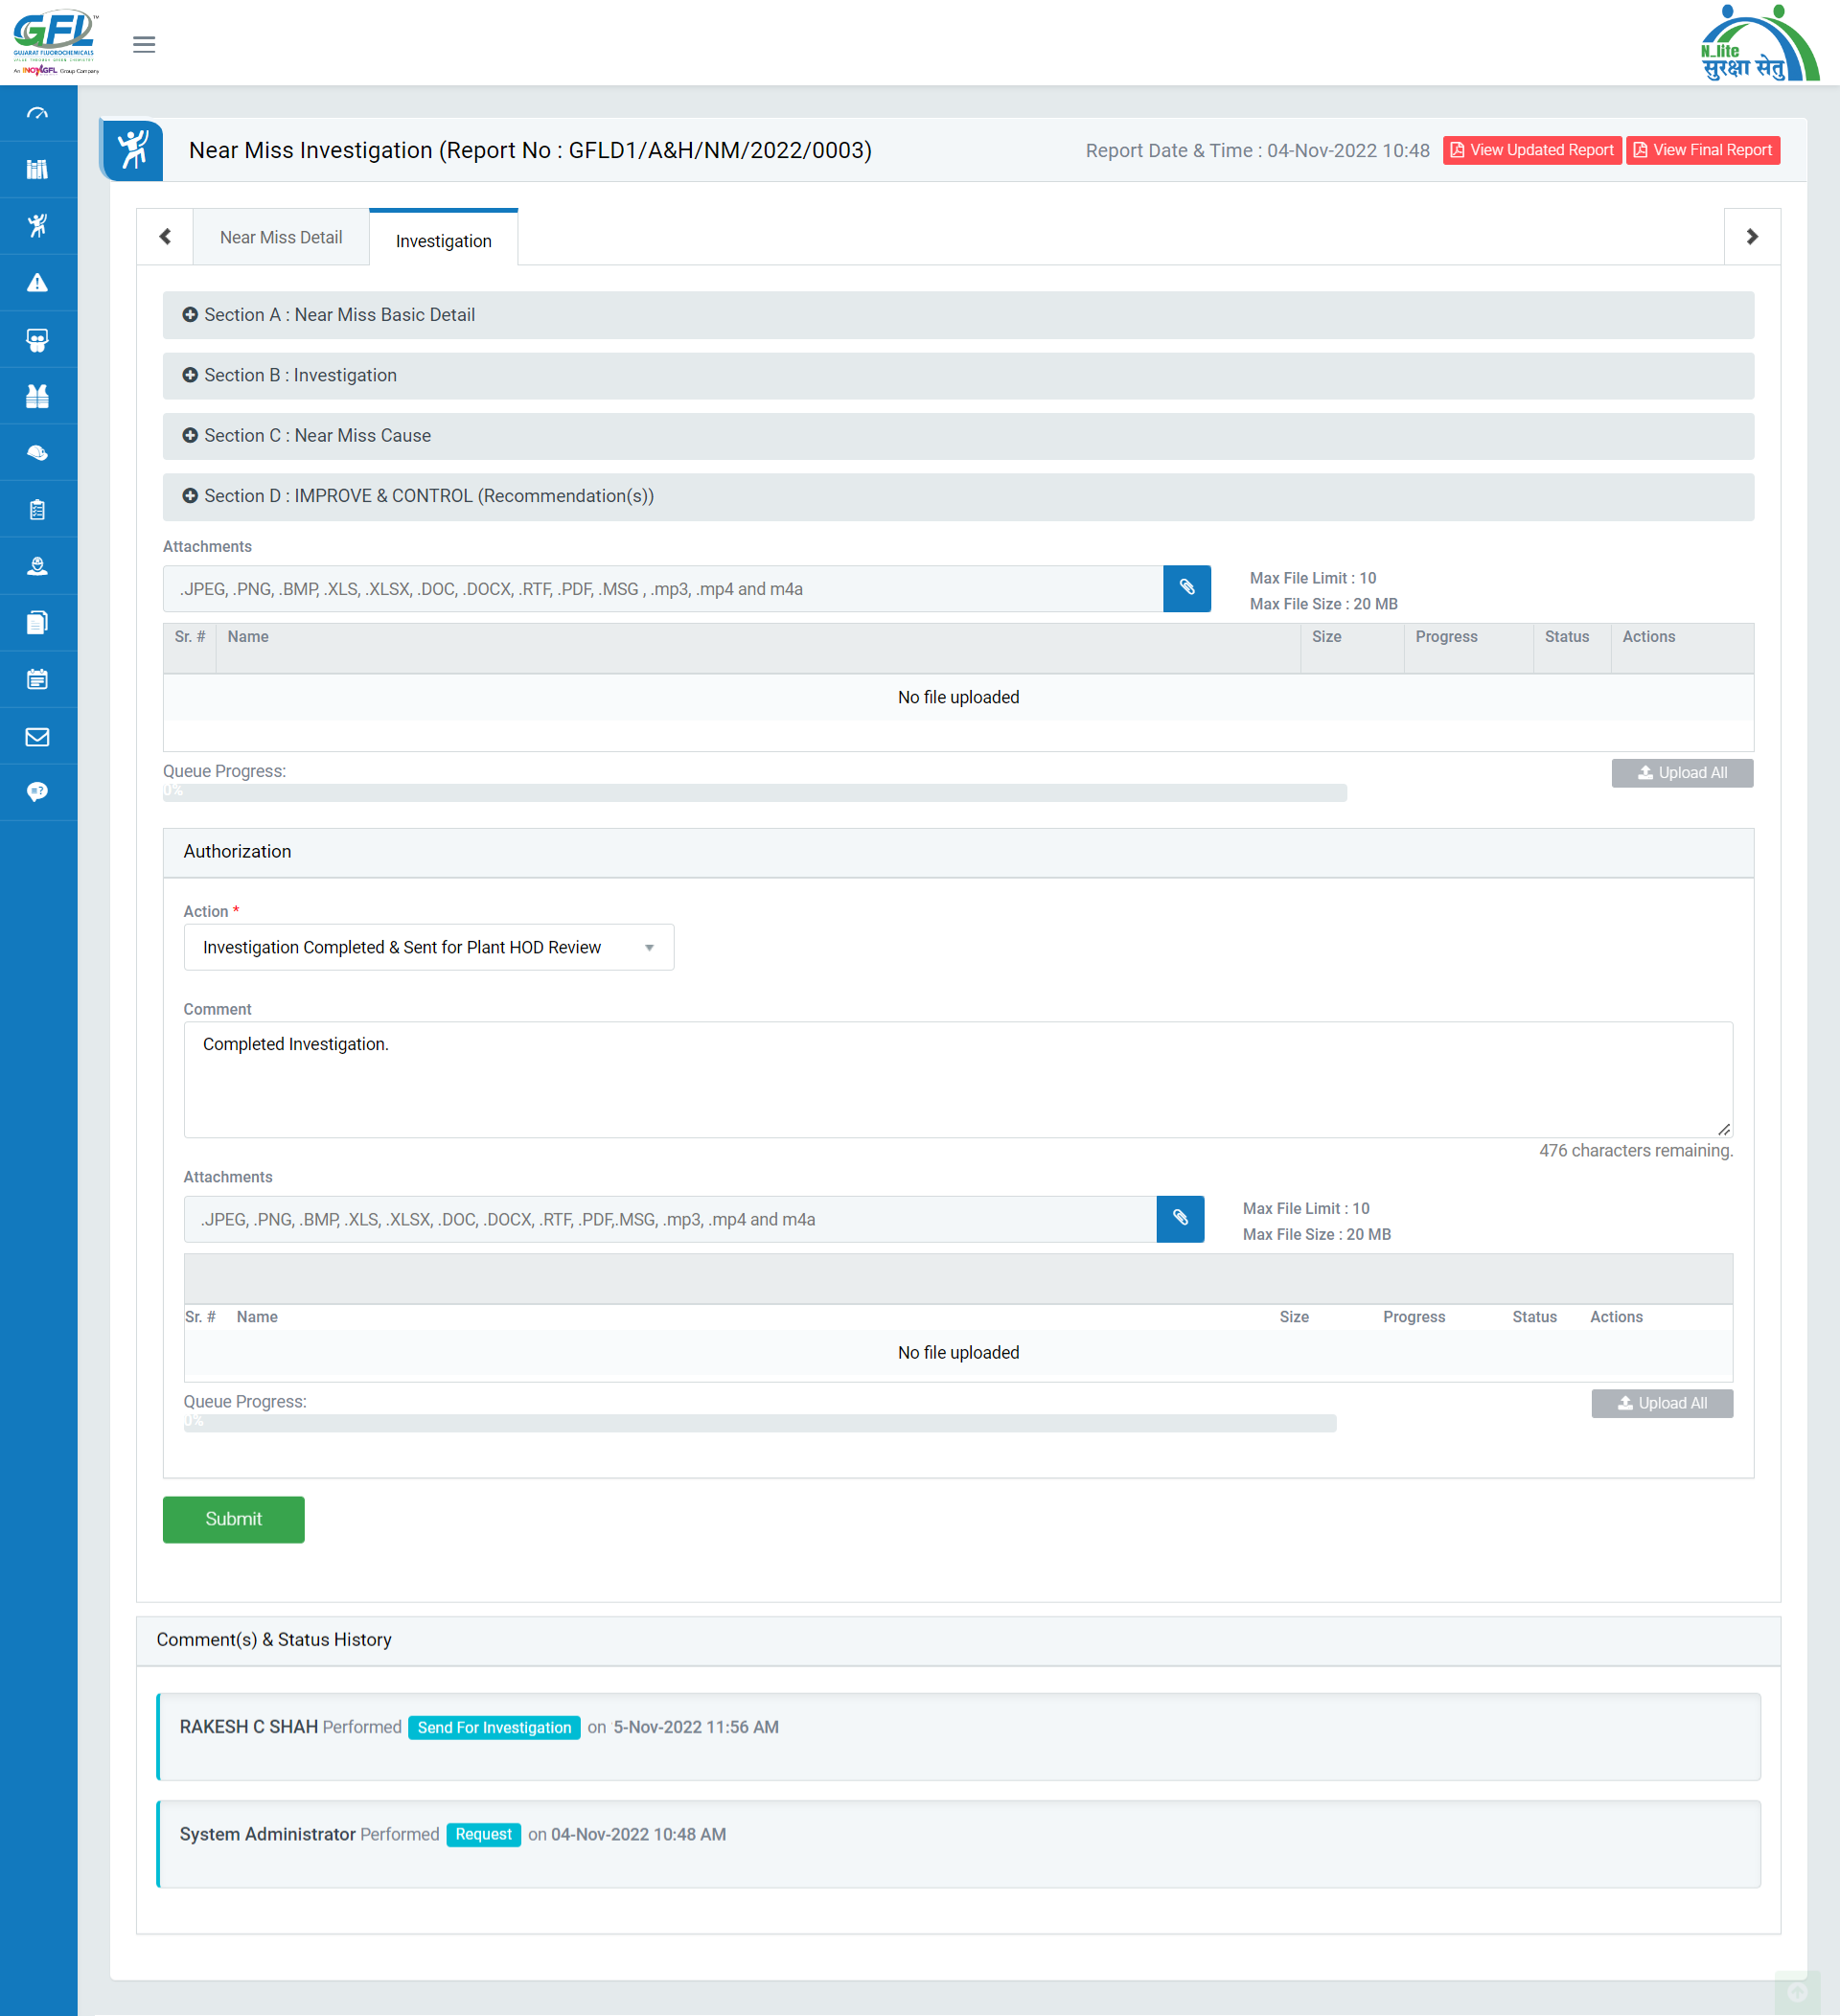
- Click on “Hyperlinked Subject” in Subject column to review Near Miss which will be opened in different tab. (Image 2)
- By default, all prefilled data will automatically be displayed, and it will be disabled.
- There are 4 sections under investigation where user can enter investigation details.
- Section A: Near Miss Basic Details – This section explains the near miss that occurred. This section will contain pre-filled data.
- Section B: Investigation – To update the sequential occurrence and activity of person(s) involved.
- Section C: Near Miss Cause – To identify and mark direct cause, unsafe condition, root cause & personal factors.
- Section D: Improve & Control (Recommendations) – Section to assign CAPA.
- Investigation Team can attach files by clicking on Attach button.
- Click Upload button to upload the attached file and click Delete button to delete the file. (Total attachment files size upload limits up to 20MB and number of file attachment allow up to 10. Attachment files extension would be allowed such as “.JPEG, .PNG, .BMP, .XLS, .XLSX, .DOC, .DOCX, .RTF, .PDF, .mp3, .mp4, and .m4a”)
- Select Authorization by selecting the option from the drop-down list.
- Investigation Completed & Sent for Plant HOD Review: Select this option to mark the investigation as completed and to send for review to Plant HOD.
- “Submit” button will not get enable until status is not selected.
Note :
- Investigation Team can edit the report contents.
- The fields marked with * are mandatory to be filled.